VALE
ROLE: Design | Animation | Art Direction
DATE: 2022
SOFTWARE USED: Cinema 4D | Redshift | Illustrator | After Effects
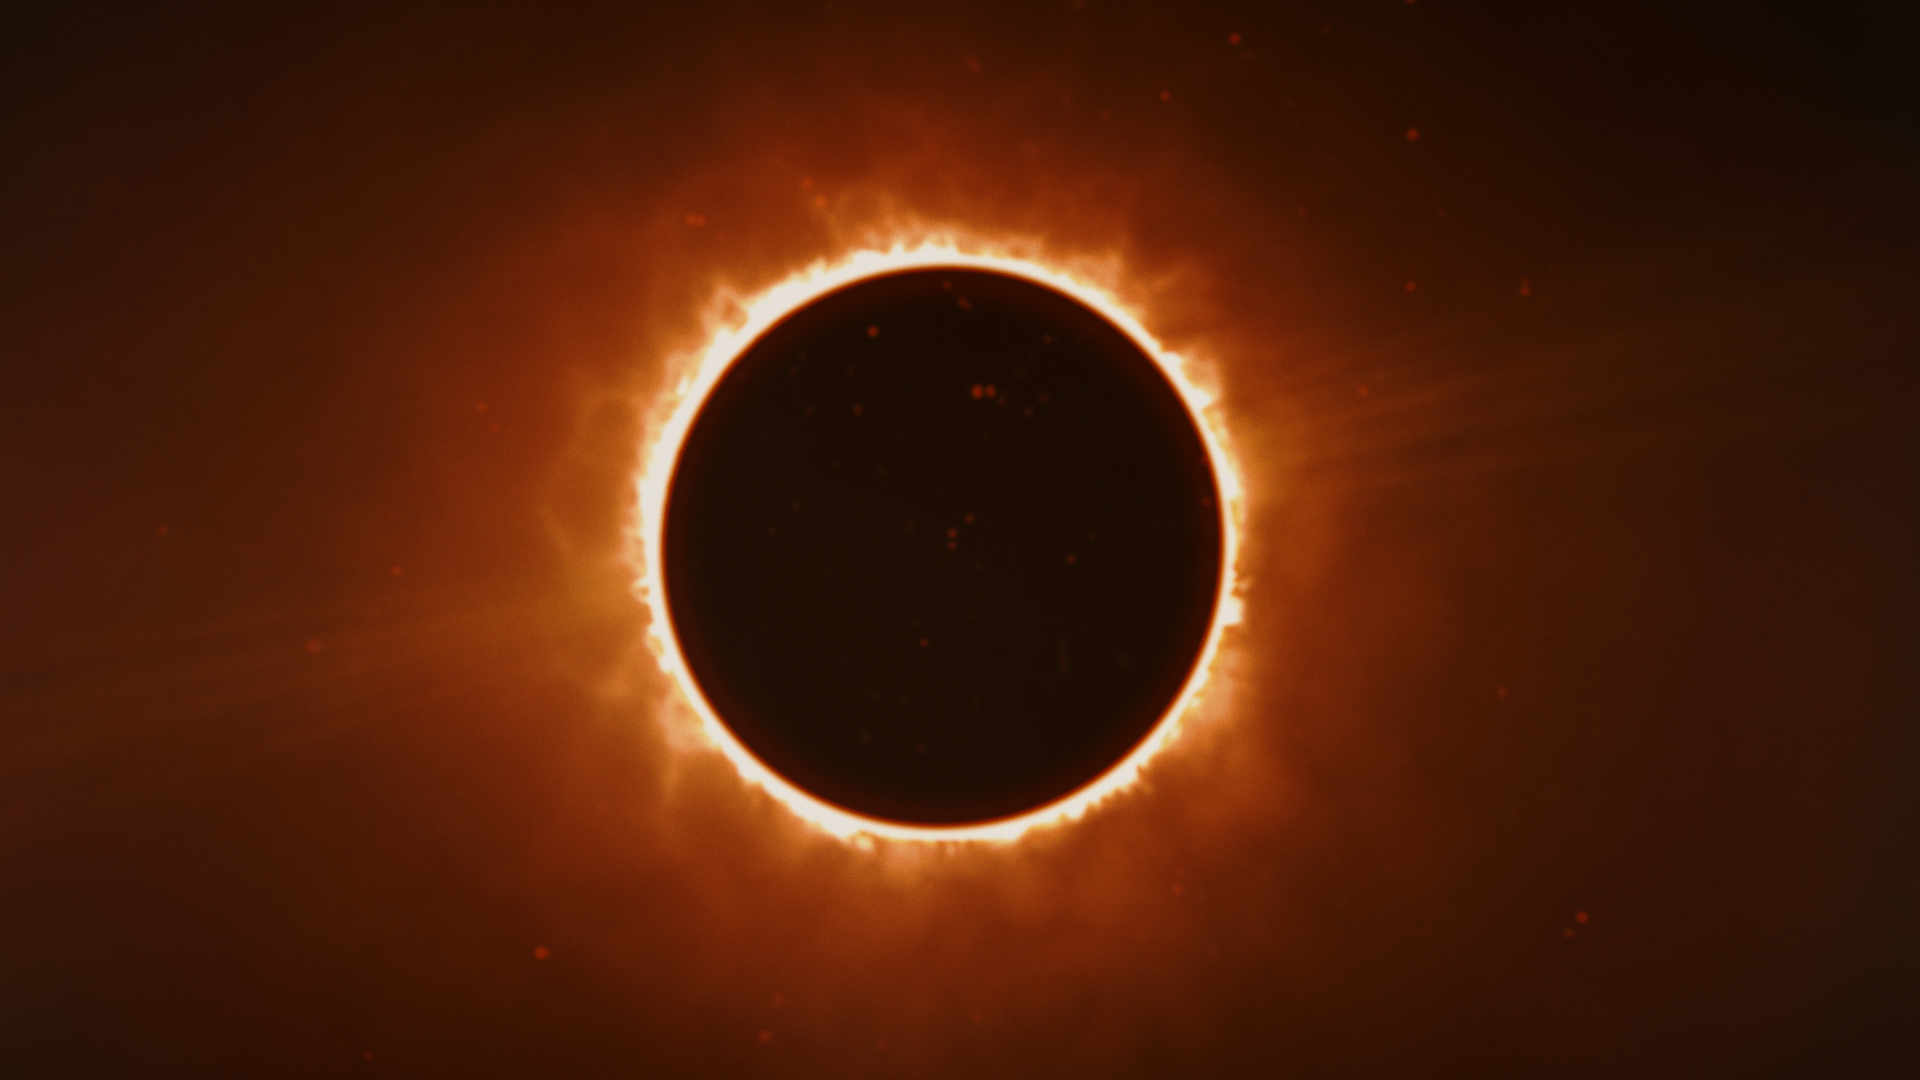
Vale is a title card created for a fictional film, inspired by Berserk and Dark Souls. It tells a story of a hero’s final journey knowing that they would face imminent death. Vale is a Latin word for a spoken farewell, the eclipse is a key plot point in the story and represents the end of the world in the film.
This project was created to practice my art direction and design skills. I also wanted to exercise my topology knowledge for typography in 3D and also test my execution of compositing and integrating 3D assets into After Effects (also to try and make a kickass styleframe).
“Beneath an unsinking black sun...through the boundless gloom...our journey continues.”
― Kentaro Miura (R.I.P)
Music from Dark Souls 3
PROCESS
The project began with the creation of of the typography for the titlecard. I wanted the design to be original so I built the typography from scratch, sketched it out then brought it into Illustrator. I drew inspiration from heavy metal logos from the 80’s and old gothic steel letters.
In Illustrator I created pixel perfect guides with matching widths of letters and angles. The logo is designed to be symetrical so I built the shapes intentionally to mirror eachother and have different nuances in them that create dynamism.
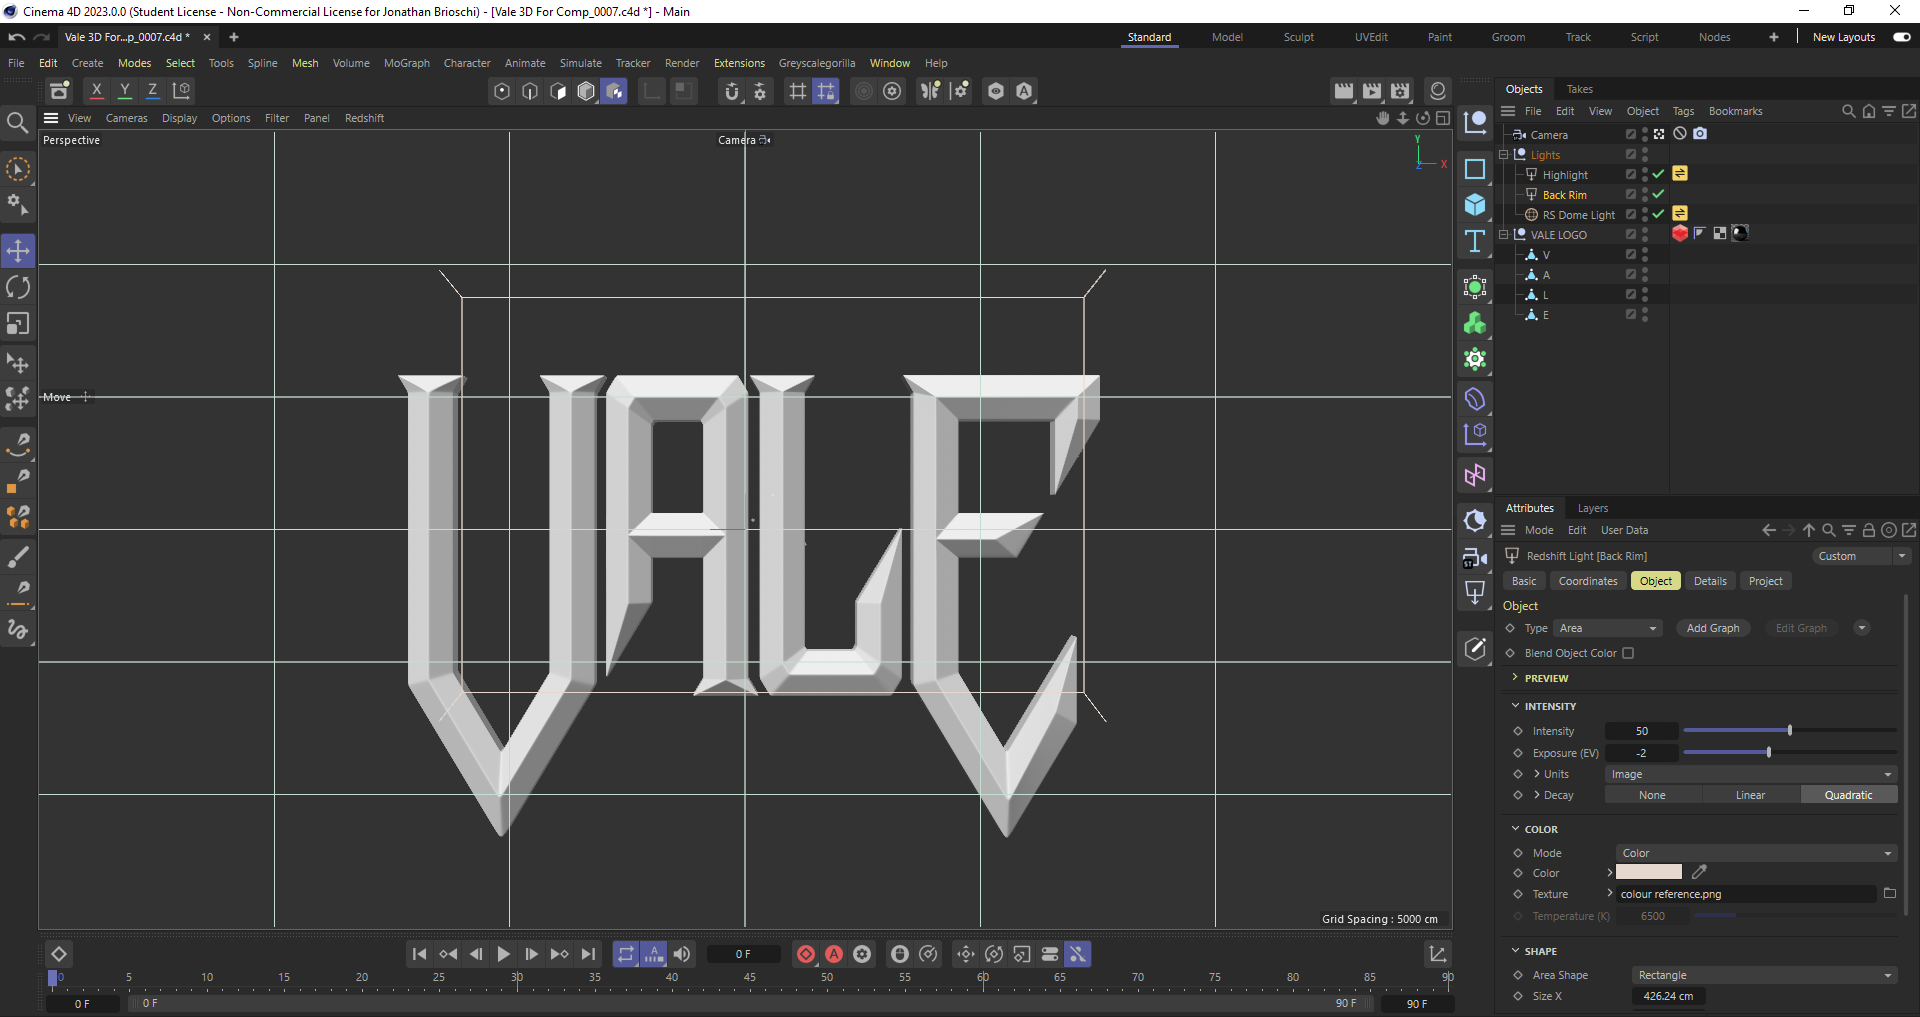
After finishing the design in Illustrator I brought it into C4D; this is where the real work began. I used the Vector Import in C4D to bring in the logo as a base. I then extruded it then made it editable so I could begin the hardsurface modeling.
Finding the initial technique was difficult but once I figured it out I replicated it throughout each letter. Basically, in the logo’s unsubdivided state I would merge the centre points and extrude certain points out to create a low poly chiseled look. After that I used strategic loop cuts to create the rounding for the subdivision.
In Illustrator I created pixel perfect guides with matching widths of letters and angles. The logo is designed to be symetrical so I built the shapes intentionally to mirror eachother and have different nuances in them that create dynamism.
After finishing the design in Illustrator I brought it into C4D; this is where the real work began. I used the Vector Import in C4D to bring in the logo as a base. I then extruded it then made it editable so I could begin the hardsurface modeling.
Finding the initial technique was difficult but once I figured it out I replicated it throughout each letter. Basically, in the logo’s unsubdivided state I would merge the centre points and extrude certain points out to create a low poly chiseled look. After that I used strategic loop cuts to create the rounding for the subdivision.


COMPOSITING
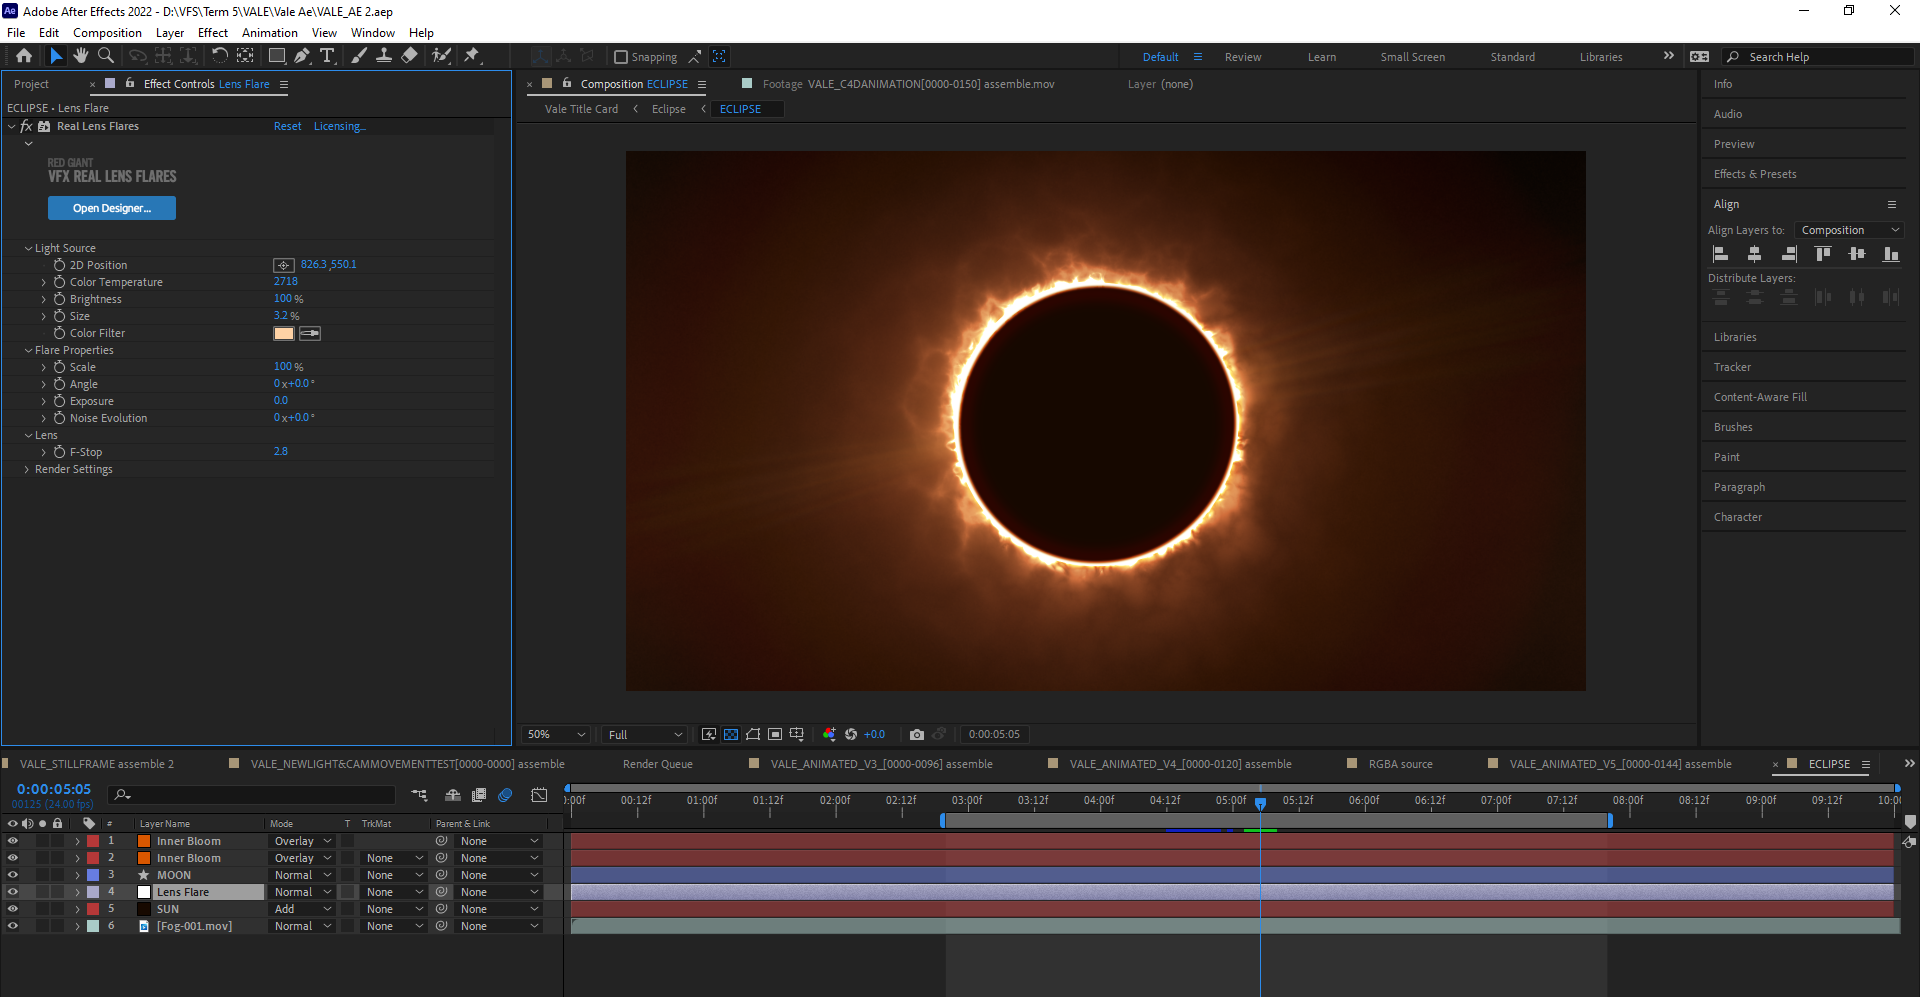
After the modeling the logo in 3D I began creating the eclipse in After Effects, I went with a more photobash workflow to avoid long simulation time with fire and smoke inside Turbulence FD or Houdini.
Once the eclipse was created I exported that animation and brought it into C4D to use as a rim light in the scene. Lighting metal was probaly one of the most difficult parts of this project, with so much reflection, it picks up a lot of light so it’s a big dance with the roughness of the metal and the brightness/position of the light. My solution was using a GSG dome light, giving the logo enough shadow and then using an area light in front as a highlight to create a focal point.
The composite of the logo into AfterEffects consisted of matching the grade of the eclipse without the metal being too orange or looking like gold. Finally all pieces of the scene were split into 3D layers, then adding a camera and animating it. I would’ve done the camera in C4D if the animation was more complex but this method was less of a headache for the 3D layers in AfterEffects.

© JONATHAN BRIOSCHI 2024